 Pin it
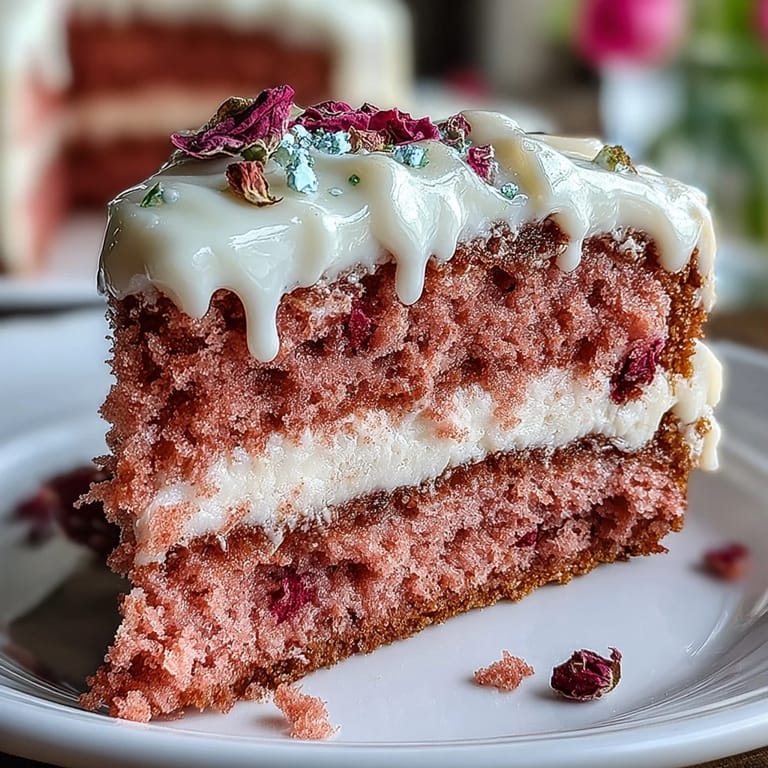
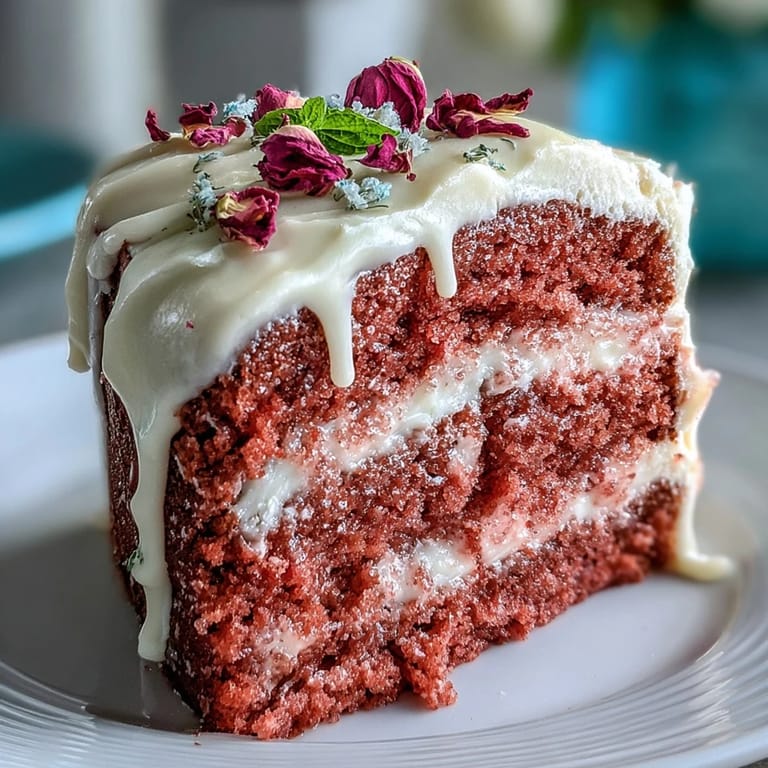
 The first time I made this Rosé Velvet Cake, sunlight was streaming through the kitchen window and the air held that telltale anticipation of celebration. My counter was a flutter of pink and gold — and, as the scent of vanilla mingled with roses from the centerpiece, even I paused to admire how magical the batter looked in the bowl. There was a moment when my spatula dripped a little too much of the paint, but the outcome was far more whimsical than planned. I’ve learned bridal shower days carry an energy of their own — and somehow, this cake matches it. It’s become a symbol of marking joyful milestones with a bit of shimmer and a glass of rosé close by.
I once made this cake for my friend’s bridal shower, fingers slightly trembling as a whole table of mothers, sisters, and best friends awaited dessert. Laughter filled the room as we debated whether the gold drip was 'too much,' but in the end, not a crumb remained — just happy, frosting-dabbed smiles and a few jokes about turning every occasion into a pink velvet party.
Ingredients
- All-purpose flour: Sifting it gives the cake the pillowy softness that makes each bite melt.
- Granulated sugar: Whisking this evenly into your dry mix ensures just the right level of sweetness throughout.
- Baking soda: Leavens the cake for height, and never skip double-checking its freshness before you begin.
- Fine salt: A pinch sharpens the flavors and balances the sweetness, though you’ll barely notice it’s there.
- Unsweetened cocoa powder: Adds a subtle depth of flavor and helps give definition to the pink hue.
- Vegetable oil: Keeps the crumb extra-moist even if you're making the cake a day ahead.
- Eggs: Make sure they're at room temperature; it really does help everything come together more smoothly.
- Buttermilk: The gentle tang is essential for a tender texture and blends well with rosé.
- Rosé wine: Use a dry or sparkling bottle – cheap isn’t worth it, but you don’t need the fanciest either.
- Vanilla extract: I always add a splash extra for that homey aroma.
- White vinegar: Reacts with baking soda to lift the cake and fine-tune the crumb structure.
- Pink or rose gel food coloring: Gel creates the most vibrant color without watering down the batter.
- Unsalted butter: Let it soften fully for the fluffiest buttercream.
- Powdered sugar: Sifting means no lumps, which is crucial for that satiny swirl on top.
- Heavy cream: Makes the gold drip luscious and easy to pour.
- White chocolate chips: Smooth melting chips are safest for a flawless drip.
- Edible gold luster dust: I learned the hard way not all luster dusts are edible — always read the label!
- Vodka or clear lemon extract: A quick evaporating liquid lets you paint on shimmer without streaks or dissolving the drip.
- Optional decor (edible gold accents, rose petals, berries): These add a final flourish and can be tailored to any bridal theme.
Tired of Takeout? 🥡
Get 10 meals you can make faster than delivery arrives. Seriously.
One email. No spam. Unsubscribe anytime.
Instructions
- Get Everything Ready:
- Preheat the oven to 350°F (175°C), grease and line three cake pans, and let the anticipation settle in.
- Sift Dry Ingredients:
- Combine flour, sugar, baking soda, salt, and cocoa powder in a large bowl, and savor the soft hiss as the dry mix falls through the sieve.
- Whisk Wet Ingredients:
- Vigorously whisk oil, eggs, buttermilk, rosé, vanilla, and vinegar in a separate bowl until the mixture looks creamy and unified.
- Mix and Tint:
- Pour wet into dry, stir till just combined, then swirl in the food coloring — it’s like painting with dessert.
- Bake the Layers:
- Divide the batter across the pans, bake for 30-35 minutes, and let their sweet scent signal they're ready.
- Cool the Cakes:
- Let the cakes rest in their pans for 10 minutes, then tip them onto a rack and let all the warmth escape before decorating.
- Make the Rosé Buttercream:
- Beat the butter until cloud-like, then slowly add powdered sugar before whisking in the rosé, vanilla, and salt until dreamy and fluffy.
- Assemble and Fill:
- Level layers, stack with buttercream in between, secure with a crumb coat, and chill so the frosting sets bravely in place.
- Final Frosting:
- Spread the last layer of buttercream, smoothing or swirling however your heart desires.
- Prepare the Gold Drip:
- Melt white chocolate with cream, let it cool, then mix luster dust with vodka until it becomes a glimmery paint.
- Drip and Decorate:
- Pour chocolate gently over the edge for cascading drips, let it firm, and paint with gold for a showstopping finish.
- Final Touches:
- Add rose petals, golden flecks, or berries for flourish and a festive, edible confetti effect.
 Pin it
 Watching the bride-to-be’s face as she cut through the blushing pink layers, gold glinting in the afternoon sun, I realized how much joy can be poured into a cake. Sometimes, a dessert becomes woven into the memory of the day itself — laughter, hugs, and all the little golden details shared around the table.
The Gold Drip Trick Everyone Asks About
The key to a shimmering gold drip that actually looks luxurious is patience and really letting the white chocolate cool before dripping. If it's too warm, it'll run right off; too cool, it won’t spread at all. I like to test one drip on the back of a spoon before committing to the cake — a tiny moment of suspense adds to the fun.
How to Keep Your Pink Vibrant
Gel food coloring will give you the brightest, most cheerful pink with just a drop or two. Liquid food color sometimes thins the batter, dulling both color and texture, so gel is worth seeking out. If in doubt, add the color slowly, mixing gently to avoid streaks.
Make-Ahead and Assembly Shortcuts
Don’t hesitate to bake the cake layers a day ahead and chill them wrapped tightly in the fridge — they’re actually easier to frost that way. Your buttercream can also wait, just let it come to room temperature before using so it's super spreadable. When assembly day arrives, split up the jobs if friends are around; one can drizzle the gold while another arranges petals, and together it's a decorating party in itself.
- If you don't have three pans, bake in batches — just be sure to clean and re-grease each time.
- Always sift powdered sugar for silky smooth buttercream.
- Double check your edible gold is labeled 'edible' — safety first, always.
 Pin it
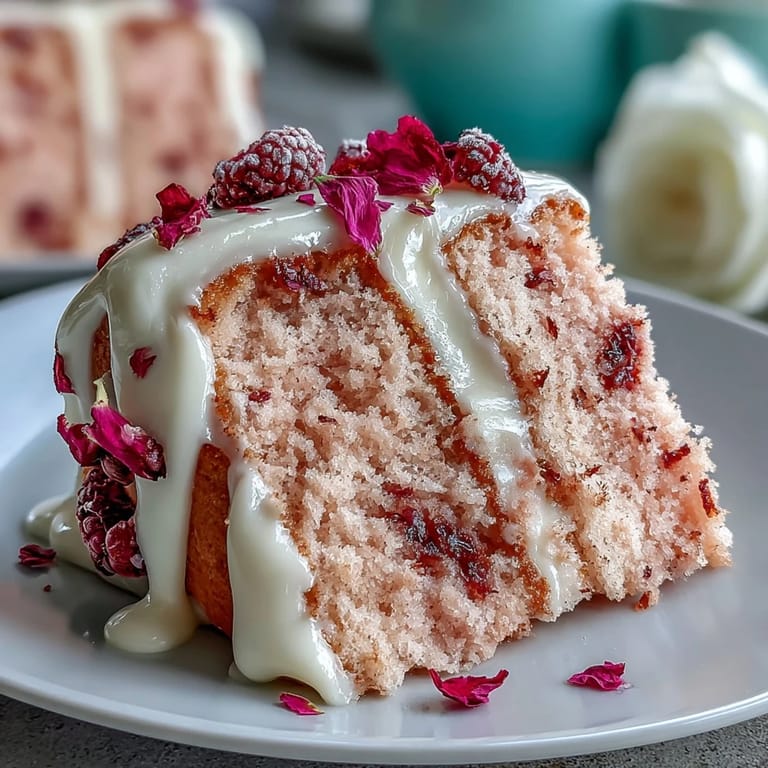
 Whether or not you’re hosting a bridal shower, this cake makes any day feel extraordinary and just a little bit magical — exactly how good friends gather around dessert should feel.
Recipe Questions & Answers
- → Can I use sparkling rosé or should I choose a dry one?
Both work. A dry rosé adds subtle floral and fruity notes without extra fizz, while a sparkling rosé brings a brighter aroma. Much of the alcohol cooks off during baking, so choose based on the flavor lift you want and adjust other liquids slightly if using a very effervescent wine.
- → How do I keep the layers even and get clean slices?
Level each cooled layer with a serrated knife or cake leveler, chill after the crumb coat to firm up the buttercream, and use a sharp, warmed knife wiped between cuts for smooth, even slices.
- → How can I stabilize buttercream when adding rosé?
Add the wine gradually, beat until incorporated, and use powdered sugar to tighten consistency if it becomes loose. Chill briefly if needed; a slightly cooler buttercream holds structure better when stacking and decorating.
- → What can I use instead of vodka for mixing gold luster dust?
Clear lemon extract is a good non-alcoholic option that evaporates quickly and carries flavor. Food-safe glycerin or a small amount of clear high-proof spirit also work; test a small batch to ensure proper paint consistency.
- → How do I get a smooth, shiny gold drip?
Make a white chocolate ganache with the right cream ratio, cool until just pourable, and apply from the center edge to encourage even drips. Paint with edible gold luster while the drip has set but is still tacky for best adhesion and shine.
- → What are the best storage and make-ahead practices?
Assemble and chill the cake up to a day ahead, stored covered in the refrigerator. Bring to room temperature before serving to soften the buttercream. Keep the gold-painted areas dry and avoid non-edible metallics; the finish holds best when protected from humidity.