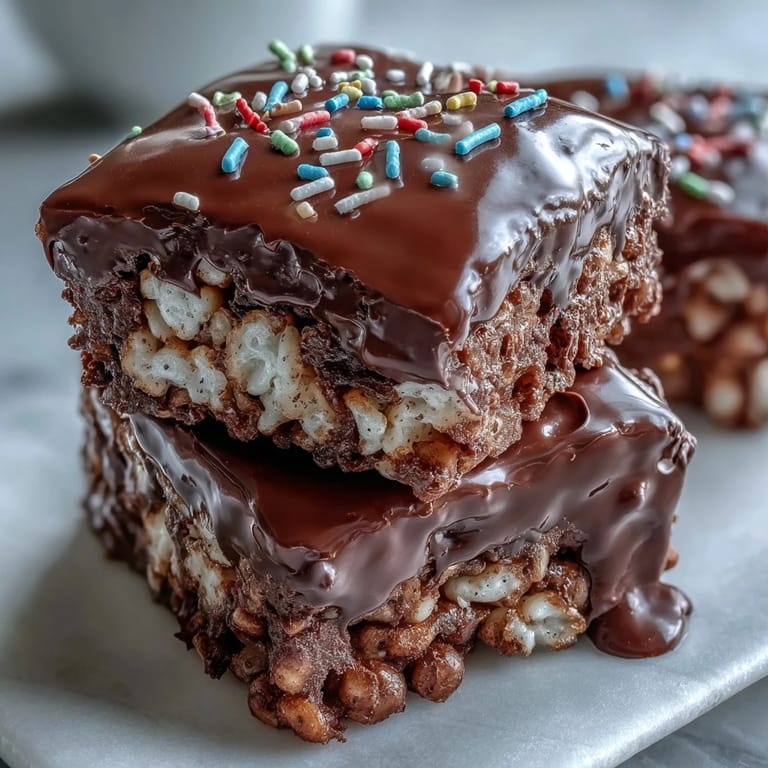
 Pin it
 My kids discovered these at a school bake sale years ago, and I watched them devour two bars before we even made it to the car. That sticky-fingered enthusiasm made me realize these weren't just treats—they were instant nostalgia wrapped in chocolate. Now whenever I make them, the kitchen fills with that unmistakable marshmallow sweetness, and suddenly everyone's gathered around waiting for that chocolate shell to set. There's something magical about turning three simple ingredients into something that feels like a celebration in bar form.
I made these for my book club one evening, and a friend who normally skips dessert actually asked for the recipe before leaving. She said it was the texture that got her—that unexpected crunch followed by the soft give of marshmallow under a thin chocolate coat. It wasn't fancy or complicated, but something about that honest simplicity made everyone at the table smile. That's when I understood these treats aren't about impressing anyone; they're about creating a small moment of joy.
Ingredients
- Unsalted butter (6 tablespoons, plus extra): Use real butter—it creates a richer base than margarine and helps the marshmallows melt smoothly without any weird aftertaste creeping in.
- Mini marshmallows (1 package, 10 ounces): Mini marshmallows are your secret because they melt faster and distribute more evenly than large ones, giving you a better texture throughout.
- Rice Krispies cereal (6 cups): Measure by volume, not weight—you want that light, airy cereal that hasn't been crushed or stale, so it stays crispy and doesn't turn into powder.
- Fine sea salt (¼ teaspoon, optional): A tiny pinch of salt cuts through the sweetness and makes the chocolate flavor pop, but skip it if you prefer pure sweetness.
- Semisweet or dark chocolate chips (1 ½ cups): Choose quality chocolate here because it's doing all the visual and flavor work on top—cheap chips seize up and look dull.
- Vegetable or coconut oil (1 teaspoon): This keeps the melted chocolate glossy and smooth instead of thick and seized; don't skip this step even though it feels tiny.
- Rainbow sprinkles or chopped nuts (2 tablespoons, optional): Add personality—the sprinkles go on immediately while chocolate is still warm, so they stick without sliding off.
Tired of Takeout? 🥡
Get 10 meals you can make faster than delivery arrives. Seriously.
One email. No spam. Unsubscribe anytime.
Instructions
- Prep your pan like you mean it:
- Lightly butter an 8x8 or 9x9-inch square pan—this prevents sticking and makes cutting clean bars later. If you have parchment paper, line the bottom and let some hang over the edges for easy lifting.
- Melt butter gently:
- Use low heat and stir constantly so the butter stays pale and smells like toasted nuts instead of browning and turning nutty in a bad way. Watch it carefully—this takes about 2 to 3 minutes.
- Marshmallows transform:
- Add the mini marshmallows and keep stirring as they soften, collapse, and eventually become one smooth, glossy mixture. It'll look like fluffy clouds dissolving into sweetness, which is exactly what you want.
- Season and fold:
- Stir in salt if you're using it, then add the cereal in one big pour and gently fold with a spatula so every piece gets coated without crushing anything. You're looking for even coverage, not pulverized cereal.
- Press and set:
- Transfer to your buttered pan and use a buttered spatula or your hands to press the mixture firmly and evenly into the pan—don't leave air pockets or they'll collapse when you slice. Let it rest for 10 minutes at room temperature.
- Chocolate magic happens:
- Combine chocolate chips and oil in a microwave-safe bowl, then microwave in 30-second bursts, stirring between each, until silky and pourable. This takes about 1 to 2 minutes total, and the oil prevents the chocolate from seizing.
- Spread like you're frosting a cake:
- Pour the warm chocolate over the cooled cereal base and spread evenly with an offset spatula or the back of a spoon, working quickly before it cools. Get it all the way to the edges so every bar gets a chocolate coat.
- Garnish before chocolate sets:
- If you're adding sprinkles or nuts, do it immediately while the chocolate is still tacky—they'll stick like they're meant to be there. Wait even a minute too long and they'll slide around.
- Let time do the work:
- Set at room temperature for at least an hour, or refrigerate for 20 to 30 minutes if you're impatient. The chocolate needs to firm up completely or the bars will be messy to eat.
- Cut with confidence:
- Use a sharp knife (wipe it clean between cuts if chocolate sticks) and press straight down rather than sawing—this keeps the chocolate shell from cracking and the bars looking neat. You should get 12 to 16 bars depending on how generous you're feeling.
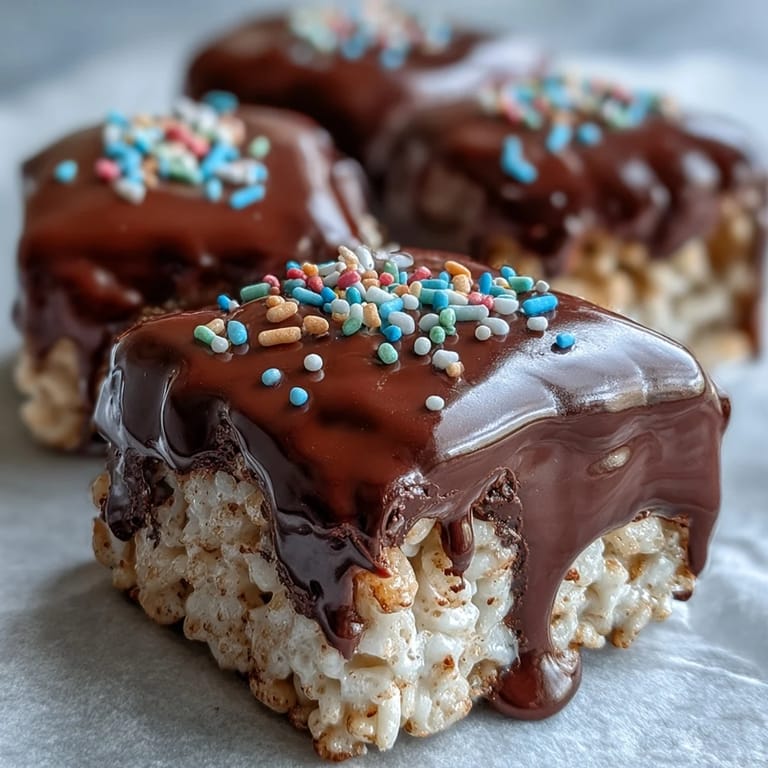 Pin it
 There was an afternoon when my mom called to say she'd found my childhood note about these being her favorite dessert I made. I'd completely forgotten I'd written that, but suddenly I was tearing up in the kitchen, thinking about how something so simple became a small thread connecting us across years. Food has this quiet way of doing that—turning ordinary moments into memories we didn't know we were making.
The Science of the Snap
The magic here isn't complicated, but it's worth understanding. When marshmallows melt into butter, they coat every piece of cereal with a sticky sweetness that hardens slightly as it cools, binding everything together without needing eggs or flour. The chocolate shell on top adds structure and seals in that crispy-yet-chewy texture, creating layers of sensation with every bite. It's textural contrast at its simplest, and that's why these bars are so addictive.
Storage and Keeping
These stay fresh at room temperature in an airtight container for about three days before the marshmallow starts to firm up and lose that slight chew. Refrigerating extends their life to a week, though they'll become a bit more brittle—which some people actually prefer because they crunch louder. I've found they travel well in a box layered with parchment paper, making them perfect for potlucks or packed lunches.
Variations Worth Trying
Once you've made these the traditional way a few times, the door opens to endless possibilities. A dash of vanilla extract stirred into the melted marshmallows adds depth, while white chocolate chips with pastel sprinkles give a completely different seasonal feel. Some friends have told me they've switched half the Rice Krispies for crushed pretzels or added a sprinkle of cinnamon to the butter before melting.
- Swirl melted peanut butter into the chocolate topping before it sets for a nostalgic twist.
- Toast the Rice Krispies lightly in a dry pan first to deepen their flavor and crispness.
- Add a tiny pinch of espresso powder to the melted chocolate for an unexpected depth that complements the sweetness perfectly.
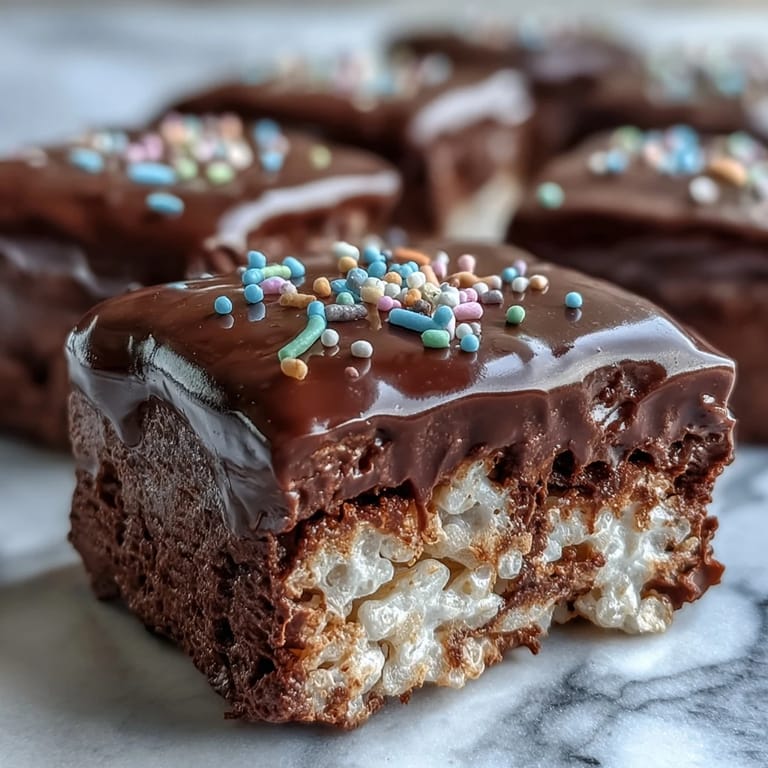 Pin it
 These treats have a way of making ordinary days feel a little more special, whether you're sneaking one before anyone else wakes up or bringing them to a gathering where they disappear in minutes. That's the whole point, really.
Recipe Questions & Answers
- → How long do these chocolate covered treats stay fresh?
Store in an airtight container at room temperature for up to 3 days, or refrigerate for up to a week. The chocolate may develop a slight bloom in the fridge but remains perfectly delicious.
- → Can I use white chocolate instead of semisweet?
Absolutely! White chocolate creates a lovely contrast and pairs beautifully with pastel sprinkles for special occasions. Just follow the same melting instructions with white chocolate chips.
- → Why add oil to the chocolate?
The vegetable or coconut oil helps the chocolate achieve a smooth, glossy consistency and makes it easier to cut clean bars. It also prevents the chocolate from seizing during melting.
- → How do I prevent the marshmallow mixture from sticking?
Butter your spatula or hands lightly before pressing the mixture into the pan. Working while the mixture is still warm (but not hot) makes it easier to spread evenly.
- → Can I make these ahead for parties?
These bars are perfect for advance preparation. Make them up to 2 days before your event and store at room temperature. Cut just before serving for the freshest appearance.
- → What's the best way to get clean cuts?
Let the chocolate set completely at room temperature for at least 1 hour. Use a sharp knife wiped clean between cuts, and score the chocolate lightly before slicing through completely.