 Pin it
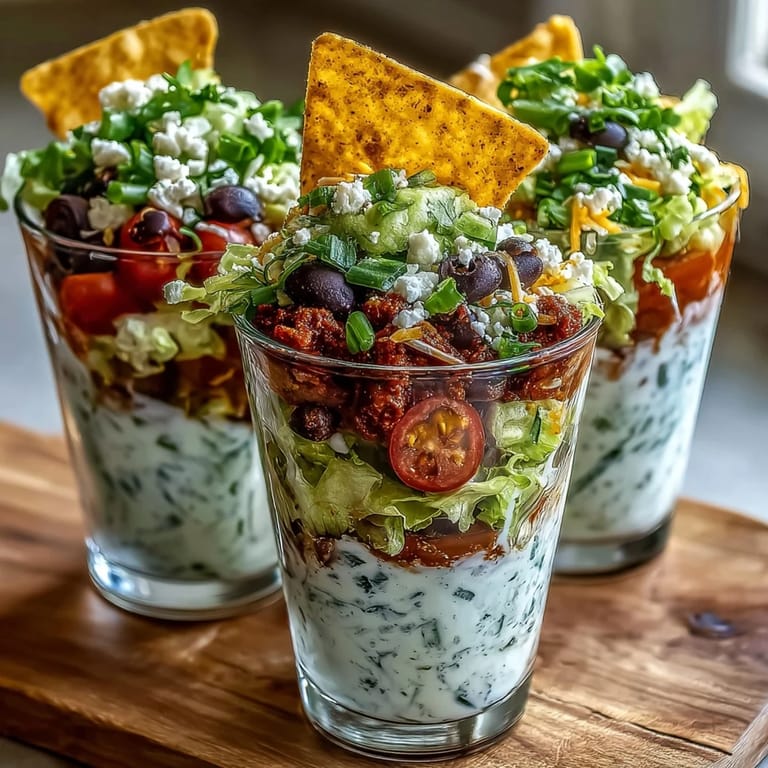
 My neighbor knocked on the door one Saturday afternoon with a panicked look—she was hosting a Cinco de Mayo party in two hours and had nothing ready. We raided her kitchen, found some tortilla chips and cream cheese, and I remembered these beautiful individual taco dip cups I'd seen at a friend's wedding. Twenty minutes later, we'd assembled eight gorgeous layered cups that looked like we'd spent all day on them. She served them with such pride, and they were gone in minutes. Now whenever I make them, I smile thinking about how she texted me a photo of the empty platter.
I brought these to a potluck last summer, and a woman who's normally quiet at these events started describing each layer to her husband like she was narrating a nature documentary. The contrast of creamy, crunchy, fresh, and cheesy in one bite had everyone reaching for seconds, and suddenly she was asking for the recipe. That's when I realized these cups had a magic to them—they made people slow down and really taste what they were eating instead of just grabbing something between conversations.
Ingredients
- Refried beans (1 can, 16 oz): These form the sturdy foundation that keeps everything from sliding around, and they add that savory depth that says taco party.
- Sour cream and cream cheese (1 cup sour cream plus 4 oz cream cheese): Together they create a luxuriously smooth layer that binds everything; the cream cheese especially keeps the mixture from getting watery as it sits.
- Taco seasoning (1 packet, 1 oz): This is your flavor backbone, but I've learned to taste the cream mixture and add a pinch more if you like it punchier.
- Shredded lettuce (1 cup): Use the crispest lettuce you can find, and save adding it until the last moment before serving so it stays crisp and doesn't wilt into the creamy layers below.
- Cherry tomatoes, diced (1 cup): The juicy sweetness balances the richness, and dicing them smaller means they stay in each bite instead of rolling out when you scoop.
- Black olives, sliced (1/2 cup): These add a briny punch and a little visual drama with their dark color against the bright layers.
- Shredded cheddar cheese (1 cup): Sharp cheddar melts beautifully into the warm cream layer below, while mild cheddar sits on top like a blanket.
- Green onions, chopped (1/4 cup): A handful sprinkled on top adds freshness and that little onion bite that wakes up your palate.
- Salsa (1/4 cup, optional): A spoonful on top adds brightness; I prefer pico de gallo or a chunky salsa so it doesn't make things soggy.
- Tortilla chips for serving: These are your edible spoon, so choose sturdy chips that won't shatter the moment you scoop.
Tired of Takeout? 🥡
Get 10 meals you can make faster than delivery arrives. Seriously.
One email. No spam. Unsubscribe anytime.
Instructions
- Blend the creamy base:
- In a medium bowl, whisk together the sour cream, softened cream cheese, and taco seasoning until you have no lumps and the mixture is smooth as silk. The key is softening that cream cheese first—hard cream cheese will clump and ruin the texture, so pull it out of the fridge while you're gathering everything else.
- Gather your cups and bean foundation:
- Set out your eight clear cups on a flat surface where you can work without jostling them. Spoon about 2 tablespoons of refried beans into the bottom of each cup and press it down gently with the back of your spoon so it's an even layer—this keeps everything above it stable and visible through the glass.
- Layer the creamy richness:
- Divide the sour cream mixture evenly among the cups, spooning about 2 tablespoons into each and smoothing the top with the back of your spoon. This layer should look like a cloud sitting on top of the beans, and smoothing it makes it easier to see the layers you're about to add.
- Add the fresh vegetables:
- Sprinkle a layer of shredded lettuce over the cream mixture in each cup, then scatter the diced tomatoes and sliced olives on top. You want enough of each vegetable so it's visible but not so much that it's piled high—think of it as a landscape of colors you can see through the cup.
- Crown with cheese and green onions:
- Top each cup with a generous handful of shredded cheddar cheese, then a small pinch of chopped green onions. The cheese creates a golden-yellow border at the top, and the green onions add a pop of color and freshness that says you paid attention to detail.
- Add a final flourish:
- If you're using salsa, add a small spoonful to the very top of each cup—this should be a jewel-like garnish, not dripping down the sides. A tiny dollop of salsa looks intentional and tastes like the perfect finishing bite.
- Serve immediately:
- Set the cups on a platter surrounded by tortilla chips, and watch people's faces light up when they see them. If you assembled these ahead, hold off on adding the lettuce and toppings until just before serving so everything stays crisp and fresh.
 Pin it
 My sister made these for her book club, and one member asked if she'd catered them because they looked so polished. When my sister admitted they took 20 minutes, everyone felt like they'd learned a secret—that you don't need hours in the kitchen to impress people. That moment taught me that presentation is half the battle, and clear cups do the work for you.
Perfect Timing for Every Occasion
These cups are deceptive in how simple they are, which is exactly why they work everywhere from casual backyard gatherings to office potlucks to actual celebrations. I've made them for game day (with extra jalapeños), for a bridal shower (with a sprinkle of cilantro), and even for a quiet family dinner where we each got a cup instead of a shared bowl. The magic is that they feel personal—each person has their own dip experience, and somehow that makes it taste better than if everyone were crowding around a communal bowl.
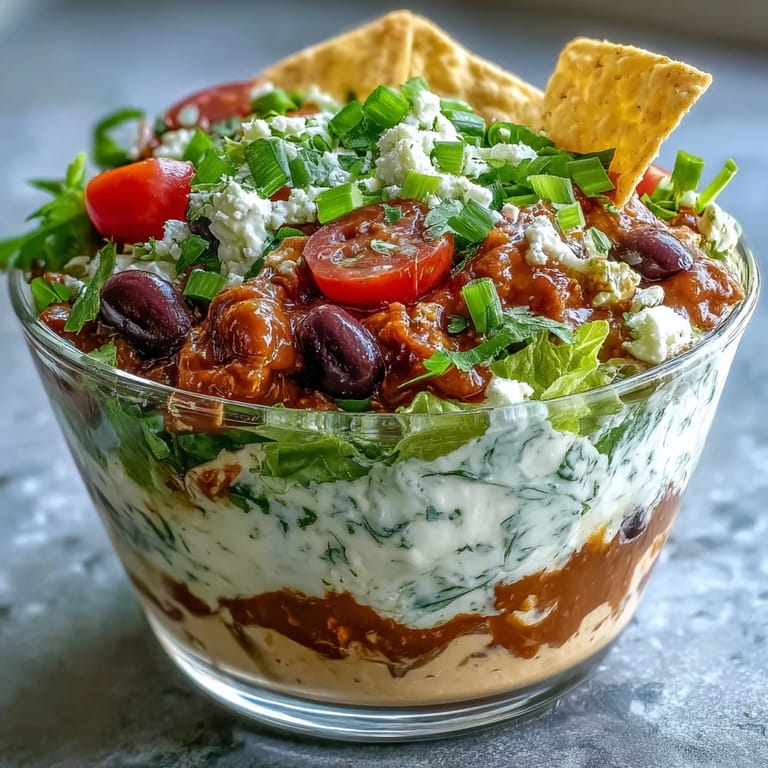
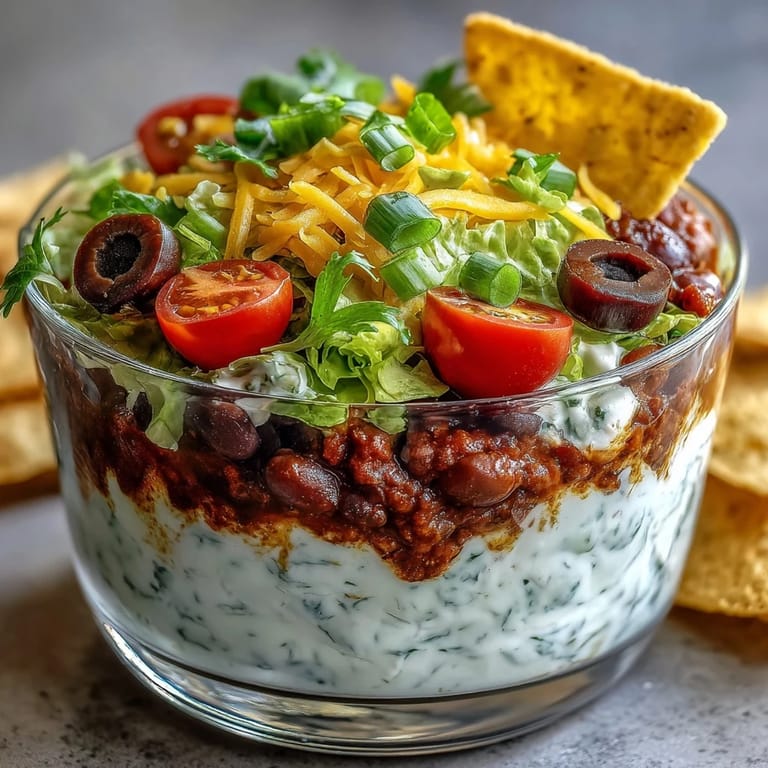
The Art of Layering
The most beautiful taco dip cups are the ones where you can see every layer through the clear sides, which means spreading and smoothing each layer matters. Use the back of a spoon and take your time—it's only 20 minutes total, so rushing defeats the purpose. I've learned that even thickness in each layer not only looks stunning but also means that every scoop gets a balanced bite of everything.
Storage and Make-Ahead Magic
You can assemble these cups up to 4 hours ahead if you skip the lettuce and fresh toppings, which means you can spend your party time actually enjoying people instead of still chopping vegetables. I cover them loosely with plastic wrap and pull them out about 30 minutes before guests arrive, adding the lettuce and toppings at the last moment so everything is crisp and fresh. This is why I love the recipe—it does most of the work before anyone arrives, and the finishing touches take two minutes.
- Make them in the morning for an afternoon party, and store them uncovered in the fridge so condensation doesn't make the cups sweat and smudge the view of the beautiful layers inside.
- If you do assemble everything including toppings, eat them within an hour because the lettuce and tomatoes will start releasing moisture after that.
- Transport them in a sturdy container on a flat surface, and tell your passengers not to touch the cups even though they'll want to.
 Pin it
 These cups remind me why I love cooking for people—not because it's complicated, but because simple, thoughtful food brings everyone together. Make these, and you'll understand why my neighbor still texts me photos of her Cinco de Mayo parties.
Recipe Questions & Answers
- → Can I make these cups ahead of time?
Yes, you can assemble the base and creamy layers up to 4 hours in advance. Add the fresh toppings just before serving to keep them crisp.
- → What can I use to add some heat?
Try adding sliced jalapeños or use spicy taco seasoning in the creamy layer for a spicier flavor.
- → Can I substitute any ingredients for dietary preferences?
Greek yogurt works well in place of sour cream for a lighter creamy layer, and vegetarian refried beans keep it meat-free.
- → Are these cups gluten-free?
Yes, provided the refried beans and other ingredients are certified gluten-free, this dish fits gluten-free diets.
- → What’s the best way to serve these dip cups?
Serve chilled with tortilla chips for dipping. The individual cups make it easy for guests to enjoy without mess.