 Pin it
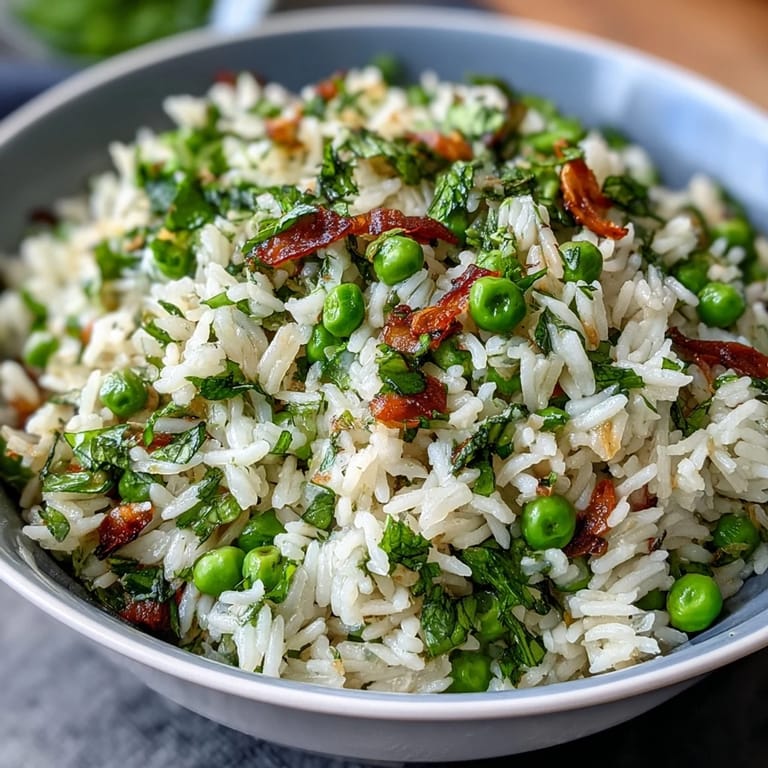
 There's something about the smell of mint hitting hot rice that stops you mid-conversation. My neighbor brought over a bunch of her garden mint one April, insisting I do something with it before it took over her entire yard, and I found myself standing in my kitchen wondering what to make. Spring peas were just hitting the farmer's market that week, and somehow this pilaf was born from sheer convenience and curiosity. Now it's the dish I reach for when I want something that tastes like the season itself.
I made this for Easter dinner two years ago as a side to honey-glazed ham, and my mother-in-law actually asked for the recipe, which never happens. The color was so vivid against the warm pink of the ham that it looked almost intentional, like I'd planned the whole meal instead of throwing it together that morning. Watching her take a second helping told me everything I needed to know about whether this recipe was a keeper.
Ingredients
- Long-grain white rice (basmati or jasmine): These varieties stay separate and fluffy instead of clumping, which is the whole point of a good pilaf—each grain should taste like it's had a little butter kiss.
- Low-sodium vegetable broth: Use the good stuff here because the broth becomes the foundation of every bite; I learned this the hard way with a box of overly salty broth that made the whole dish taste like the sea.
- Fresh spring peas: Frozen works beautifully too, and honestly sometimes they're sweeter because they're frozen at peak ripeness, but fresh peas in spring feel like a small luxury worth seeking out.
- Unsalted butter: This is non-negotiable if you want control over the final seasoning; salted butter creeps up on you.
- Fresh mint leaves: The star player here, so don't skip it or substitute with dried mint, which tastes like hay compared to the bright snap of fresh leaves.
- Lemon zest: A microplane makes this easy, and those little flecks add brightness without the pucker of juice.
- Yellow onion, garlic, salt, and pepper: The quiet supporting cast that makes everything else shine.
Tired of Takeout? 🥡
Get 10 meals you can make faster than delivery arrives. Seriously.
One email. No spam. Unsubscribe anytime.
Instructions
- Rinse your rice like you mean it:
- Run cold water over the rice in a fine mesh strainer, swishing it with your fingers until the water runs almost clear. This removes the starch that would otherwise make your pilaf gummy and sad.
- Build your aromatics base:
- Melt the butter in a medium saucepan over medium heat, then add your chopped onion and cook until it turns soft and translucent, about 2 to 3 minutes. You'll see the pieces lose their structure and become almost glassy—that's when you know it's ready for the garlic.
- Toast the garlic just enough:
- Add your minced garlic and let it cook for about 30 seconds until the raw edge softens and the smell hits you. This is such a quick step that it's easy to forget about; I've burned garlic more times than I'd like to admit by turning my back.
- Coat every grain in butter:
- Add your rinsed rice to the pan and stir constantly for a minute or two, making sure each grain gets coated in the butter and aromatics. You'll feel the rice grains slide around individually instead of sticking together, which is exactly what you want.
- Pour in the broth and bring to a boil:
- Add your vegetable broth along with salt and pepper, then turn the heat up and let it come to a rolling boil. You'll see the rice break the surface of the liquid like little islands.
- Cover and simmer low:
- Once it reaches a boil, immediately reduce the heat to low, cover with a lid, and let it cook undisturbed for 15 minutes. Resist the urge to peek; every time you lift the lid, you let steam escape and mess with the cooking time.
- Add the peas and finish cooking:
- After 15 minutes, stir in your peas (straight from the freezer if frozen, or raw if fresh) and cover again. Cook for another 5 minutes until the rice is tender and all the liquid has been absorbed.
- Let it rest and fluff:
- Remove from heat and let it sit covered for 5 minutes, which allows the rice to finish cooking gently in its own steam. Then use a fork to fluff it, breaking up any clumps and separating the grains.
- Finish with mint and brightness:
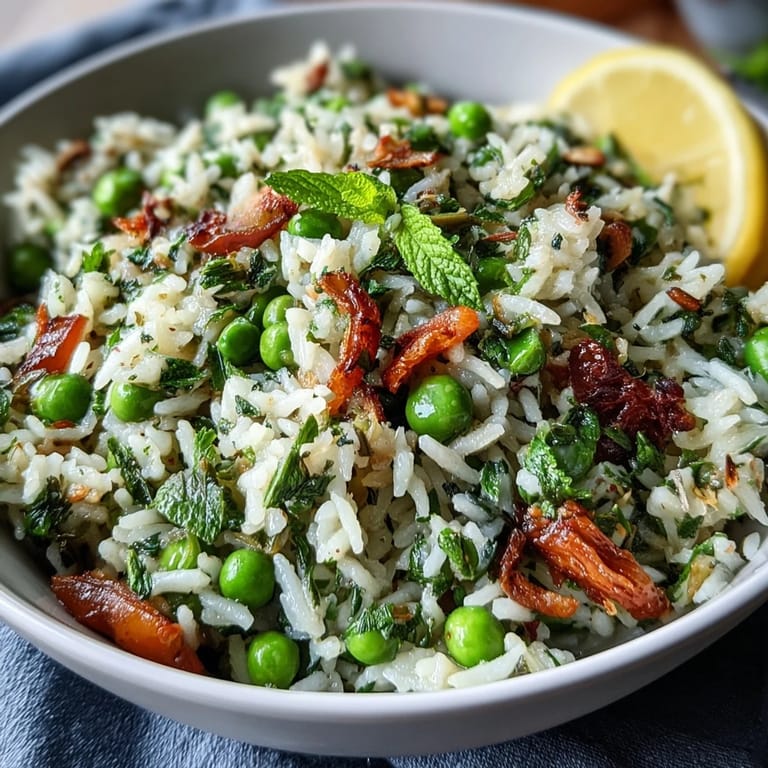
- Stir in your fresh mint, parsley if you're using it, and lemon zest while the rice is still warm so the mint releases its oils and the heat barely wilts it. Taste and adjust seasoning, then serve with lemon wedges if you want an extra squeeze of brightness.
 Pin it
 My kids will actually eat vegetables when they're mixed into this pilaf without complaint, which feels like magic considering they usually push peas to the side of their plates. That one quiet victory is worth the 35 minutes of work alone.
The Science of Steam and Absorption
There's real chemistry happening in that covered pot, even though it looks like nothing's moving. The liquid isn't just boiling away randomly; it's being absorbed grain by grain while steam rises and cooks the rice from all angles at once. I used to obsess over the exact ratio of broth to rice until I realized that as long as you keep the lid on and don't peek, the rice will find its way to tender perfection. The cover is doing all the heavy lifting, which is why I'd never make pilaf in an open pot unless I was actively stirring it the whole time.
Why Fresh Mint Changes Everything
There's a difference between knowing mint is an herb and actually tasting what fresh mint can do. The chlorophyll and volatile oils in fresh leaves create this cooling, almost electric brightness that dried mint simply can't touch. When you stir that fresh mint into warm rice, it releases these compounds and they coat every grain, and suddenly you have a dish that tastes alive instead of just seasoned. It's the difference between a pilaf that tastes nice and one that tastes memorable.
Making It Ahead and Other Variations
This pilaf keeps beautifully in the refrigerator for three days, and you can gently reheat it with a splash of broth to bring back the fluffy texture. I've also mixed half the butter with olive oil for a slightly different flavor profile, and I once added a handful of chopped scallions instead of parsley and it felt like a completely different dish. The formula is flexible enough to adapt to what you have on hand or what you're serving it alongside.
- For dairy-free, swap the butter for good olive oil or plant-based butter without changing anything else.
- Fresh lemon juice instead of zest works too, but add it after the rice is cooked so the heat doesn't turn it bitter.
- This pilaf is naturally vegetarian and gluten-free as long as your broth is certified gluten-free, making it easy to serve to guests with dietary restrictions.
 Pin it
 This pilaf is proof that simple food, made with attention to a few key details, becomes something people remember. Serve it warm and watch it disappear.
Recipe Questions & Answers
- → Can I use frozen peas in this pilaf?
Yes, frozen peas can be added directly from the freezer in the last cooking stage, making preparation simple without losing flavor.
- → What type of rice works best for this dish?
Long-grain rice like basmati or jasmine is ideal for light, fluffy grains that absorb broth and aromatics well.
- → Can I substitute butter for a vegan alternative?
Absolutely, plant-based butter or a mild olive oil can be used for a vegan-friendly version without altering the flavor profile.
- → How should I adjust seasoning for extra flavor?
Taste before serving and adjust salt, pepper, or add lemon zest for extra brightness and balance.
- → Is this pilaf gluten-free?
Yes, when using certified gluten-free vegetable broth, the pilaf remains gluten-free and suitable for sensitive diets.